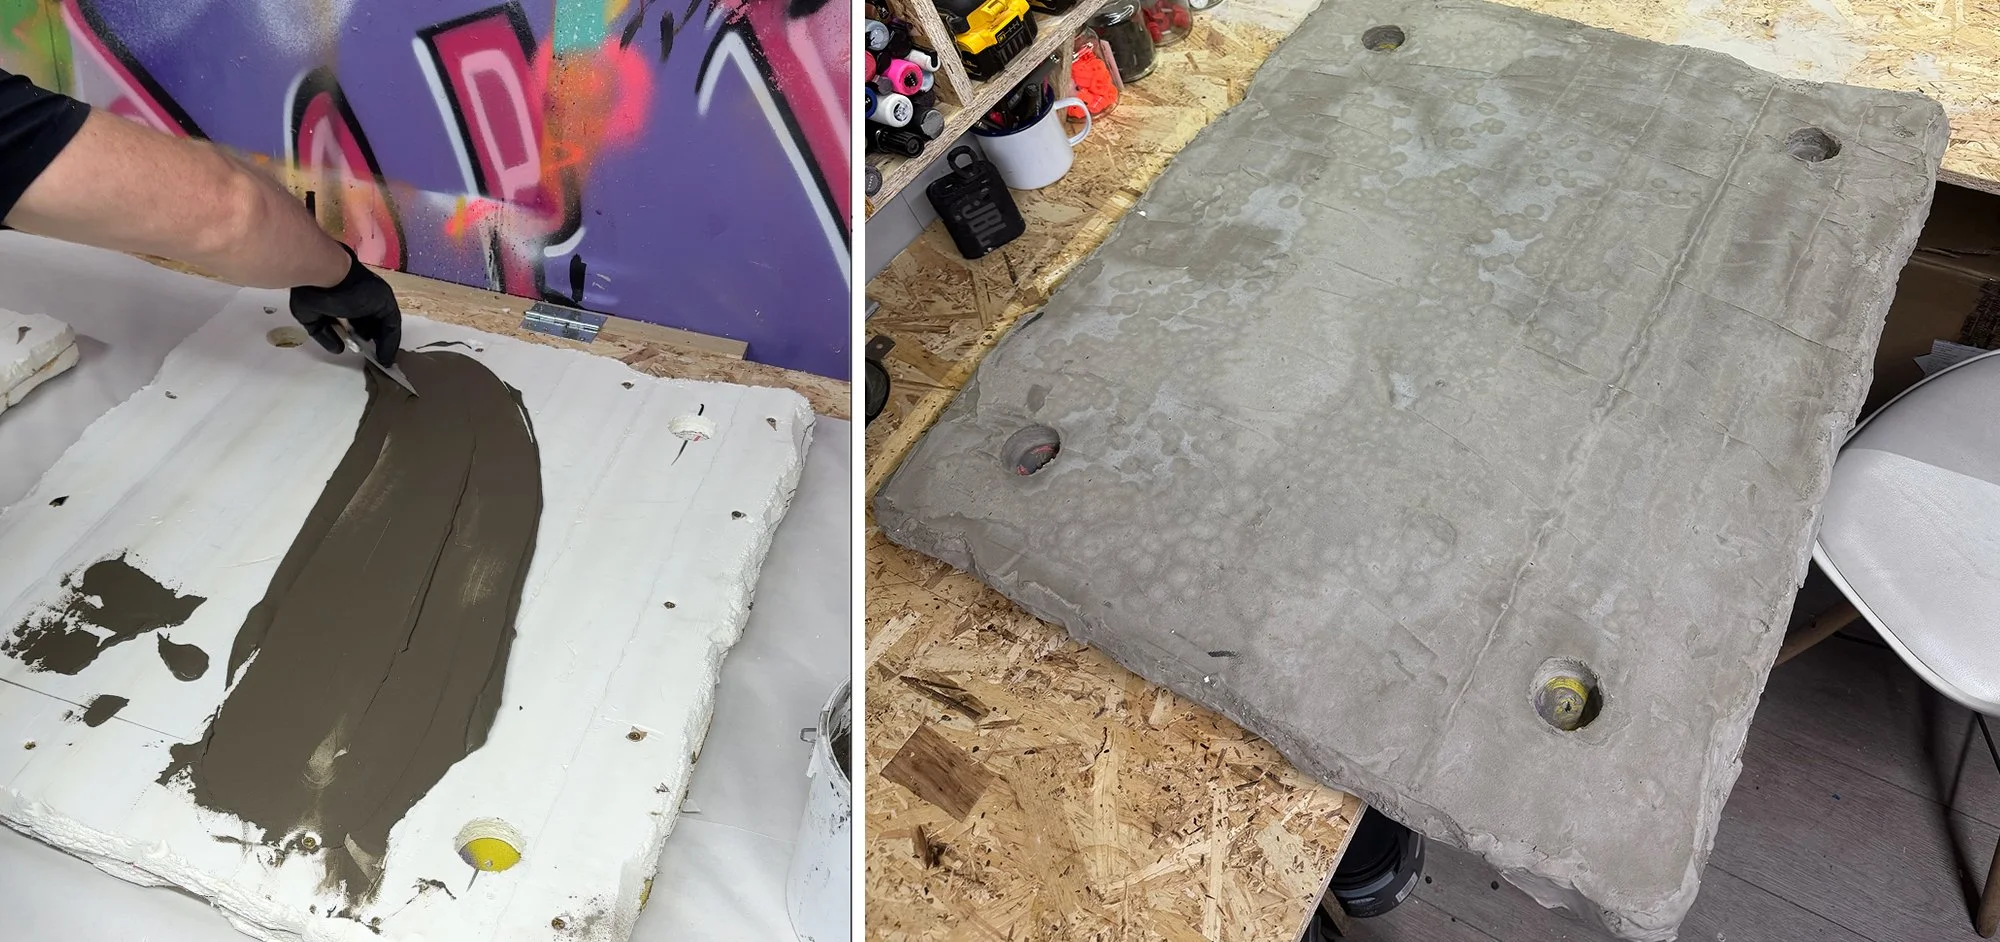
How to do a realistic concrete canvas, so that it’s light, doesn’t crack but looks like a slab of concrete was broken off a wall?
Step 1:
Choose your support, a wooden panel (Ply is good, I don’t recommend MDF as it absorbs moisture, and OSB has too many bumps) in this case I used insulation foam panels. I had some from previous failed videos so I thought I’d put them to good use. I then screwed a 5mm plywood panel to the back to give it rigidity.
Feel free to follow along in this youtube video or on instagram for the longer version.
Step 2:
I then removed the foil paper that was on the insulation, to reveal some fantastic grooves that looked like poured concrete when set! If you’re using wood or blank foam like the one you can get at 4D Model shop up in Landan Tower bridge, you would have to carve them out yourself, unless you want to keep it smooth.
Step 3:
Now this part is not necessary but I have an obsession with those holes in the concrete, they are there from keeping the 2 sides of the concrete form together, then cut down and filled slightly. I find they give such realism but if you want or need a flat surface, don’t include them. Pro tip: when you drill them out with a hole saw, screw a screw into the circle and it will just rise out of there with no trouble, as opposed to fiddle with a screw driver on the side.
Step 4:
Then I use FLEXIBLE TILE ADHESIVE!!! As people in my previous videos say I don’t want to give the details of what I use to keep the trade secret! I’ve pored out hours of content on youtube for free and barely made a buck for it, and people still moan! SMH! Buy a canvas to support what I do instead of complaining! As you can see this is clearly not written by AI. I like writing my blog, I get to write as I like without the fear of being banned, Though this is squarespace so I should still keep it kosher (as in the slang term, not insinuating anything) but then again, if squarespace has a hissy fit I’ll just take my domain back to wordpress ;-)
Back to our laurels, as a former builder (who still builds props and the odd thing for clients and friends) I once worked on a job, a fancy flat in regents street, and the tiler had used this thing (it was brown, but same difference) and years later after doing some digging, I found out it was flexible tile adhesive that is used over wooden panels, so that the wood can expand and contract without cracking the tiles. The caveat is that it adheres to the surface by showing all the imperfections due to its latex composition. In our case it’s what we want, but don’t expect it to use it as a filler.
You can dilute it well and make it quite smooth, or don’t put too much water for a more “rough” look.
It’s best to apply a layer or 2 of latex or diluted pva glue for good bonding, but refer to the packet.
Step 5:
Let it set overnight and you’re ready to go, either put another coat after priming it, or use it as is, or paint it.
Have fun!
Olivierr.